 |
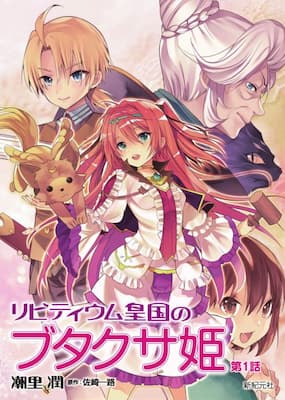
Ragweed Princess of the Livitium Imperial Kingdom
リビティウム皇国のブタクサ姫
Total Views:
10,577
Monthly Views:
3,534
Weekly Views:
1,647
Categories
Related
Vampire Princess’ Rose-colored Dream (Shared Universe)
External Links
|
Synopsis:
In the Frontier County of Aulanthia of the Livitium Imperial Kingdom, there lives Princess Syltianna who is……so ugly, both in her face and in her personality. One day, Princess Syltianna, widely known with the name the Ragweed Princess of the Livitium Imperial Kingdom, is evicted by the First Queen Consort and killed in a dark forest inhabited by demon beasts. She is then saved by a passing witch, and upon her revival, she regains her memory of her previous life as a high school boy on Earth, and decides to live in the forest as the witch’s apprentice.
“Nobles and whatnot are just a pain in the back, I’d rather live as a commoner,” she says, deciding to wash her hands off of it. Moreover, she goes the whole way to diet in between her devout training as a witch. She is supposed to live a quiet life, but after overachieving so many things, she brings her own downfall. She thinks to herself “Huh? What about my plan to live a life secretly like a weed in a forest?”
This is largely a heartwarming fantasy story. The characters are modeled after the familiar fairytale format, with princes, witches, and evil queens, but our MC is just too strong to be dealt with by any ordinary means.

Prologue
- The Ragweed Princess and The Witch Queen (Part 1)
- The Ragweed Princess and The Witch Queen (Part 2)
- The Witch’s Apprentice and The Evil Queen Consort (Part 1)
- The Witch’s Apprentice and The Evil Queen Consort (Part 2)
- Forest Training and the Black Cat Familiar (Part 1)
- Forest Training and the Black Cat Familiar (Part 2)
- The General Store of a Pioneer Village and a Birthday Gift (Part 1)
- The General Store of a Pioneer Village and a Birthday Gift (Part 2)
- The Frontier Count and the New Guild Chief (Part 1)
- The Frontier Count and the New Guild Chief (Part 2)
Volume 1
- Daily Life of the Witch and the Village’s Field (Part 1)
- Daily Life of the Witch and the Village’s Field (Part 2)
- The Village Bully and The First Friend (Part 1)
- The Village Bully and The First Friend (Part 2)
- The Rain on The Veggie Garden and The Mysterious Peddler (Part 1)
- The Rain on The Veggie Garden and The Mysterious Peddler (Part 2)
- A Letter from Best Friend and The Pet Eggs (Part 1)
- A Letter from Best Friend and The Pet Eggs (Part 2)
- Interlude 1 - Novice Adventurers
- The White Dragon Prince and The Little Egg Basket Girl (Part 1)
- The White Dragon Prince and The Little Egg Basket Girl (Part 2)
- The Boy’s Pride and The Girl’s Promise (part 1)
- The Boy’s Pride and The Girl’s Promise (part 2)
- The Sirius Cub and The Fake Princess (Part 1)
- The Sirius Cub and The Fake Princess (Part 2)
- The Village Festival and The White Dress (Part 1)
- The Village Festival and The White Dress (Part 2)
- Making Up on The Grass Field & The Addressee of The Flower Crown (Part 1)
- Making Up on The Grass Field & The Addressee of The Flower Crown (Part 2)
- Interlude 2 - The Resolve of Eren the Village Girl (Part 1)
- Interlude 2 - The Resolve of Eren the Village Girl (Part 2)
- Letter from the Imperial Capital and Treasure Map (Part 1)
- Letter from the Imperial Capital and Treasure Map (Part 2)
- First Excursion and Treasure Hunt in the Wasteland (Part 1)
- First Excursion and Treasure Hunt in the Wasteland (Part 2)
- Restoration of the Gate and the Deceased Spirits of the Ruins (Part 1)
- Restoration of the Gate and the Deceased Spirits of the Ruins (Part 2)
- The Downfall from Self-Conceit and The Spectre Princess (Part 1)
- The Downfall from Self-Conceit and The Spectre Princess (Part 2)
- The Death Knight and The Healing Light (Part 1)
- The Death Knight and The Healing Light (Part 2)
- Senior Disciple the Governor and Gossips of the Neighboring Country (Part 1)
- Senior Disciple the Governor and Gossips of the Neighboring Country (Part 2)
- The Adults Scheming and The Children Dreaming (Part 1)
- The Adults Scheming and The Children Dreaming (Part 2)
- The Choice I Made and The Secret Training (Part 1)
- The Choice I Made and The Secret Training (Part 2)
- Fertilizer Consultation and Best Friend’s Career Path (Part 1)
- Fertilizer Consultation and Best Friend’s Career Path (Part 2)
- Interlude 3 - Christy the Governor (Part 1)
- Interlude 3 - Christy the Governor (Part 2)
- The Hermitage Preparing for Winter and The Journey for Each of Us (Part 1)
- The Hermitage Preparing for Winter and The Journey for Each of Us (Part 2)
Volume 2
- The End of Journey and The Abandonment in the Capital (Part 1)
- The End of Journey and The Abandonment in the Capital (Part 2)
- The Guild’s Receptionist and Guiding a Lost Kid (Part 1)
- The Guild’s Receptionist and Guiding a Lost Kid (Part 2)
- Helping Adventurers and Work Rewards (Part 1)
- Helping Adventurers and Work Rewards (Part 2)
- Mentor’s Letter and Baroness’ Melancholy (Part 1)
- Mentor’s Letter and Baroness’ Melancholy (Part 2)
- The Prince’s Confession and The Princess’ Misunderstanding (Part 1)
- The Prince’s Confession and The Princess’ Misunderstanding (Part 2)
- Interlude 4 - Monika, the Exclusive Maid (Part 1)
- Interlude 4 - Monika, the Exclusive Maid (Part 2)
- Strolling the Market and The Slave Girl (Part 1)
- Strolling the Market and The Slave Girl (Part 2)
- Strolling the Market and The Slave Girl (Part 3)
- The Treatment of the Girl and the Reality of Slavery (Part 1)
- The Treatment of the Girl and the Reality of Slavery (Part 2)
- Her God-Emperor’s Jest and Lady Attendant’s Suggestion (Part 1)
- Her God-Emperor’s Jest and Lady Attendant’s Suggestion (Part 2)
- The Dragon Fang Sword and Return to the Frontier (Part 1)
- The Dragon Fang Sword and Return to the Frontier (Part 2)
- The Church’s Department of Divinity and The Fake Princess’ Little Sister (Part 1)
- The Church’s Department of Divinity and The Fake Princess’ Little Sister (Part 2)
- The Joy of an Apprentice Attendant and the Hobby of the Princess (Part 1)
- The Joy of an Apprentice Attendant and the Hobby of the Princess (Part 2)
- Reunion and Riot of the Undead (Part 1)
- Reunion and Riot of the Undead (Part 2)
- Interlude 5 - Prince Lucas’ Feelings (Part 1)
- Interlude 5 - Prince Lucas’ Feelings (Part 2)
- The Guild’s Branch Chief and the Reward for the case (Part 1)
- The Guild’s Branch Chief and the Reward for the case (Part 2)
- A Day in Young Lady’s Life and the Empress in Captivity (Part 1)
- A Day in Young Lady’s Life and the Empress in Captivity (Part 2)
- Practice with the Baroness and the Afternoon Tea Party (Part 1)
- Practice with the Baroness and the Afternoon Tea Party (Part 2)
- The Visit to the Orphanage and The Pickpocket Girl (Part 1)
- The Visit to the Orphanage and The Pickpocket Girl (Part 2)
- The Visit to the Orphanage and The Pickpocket Girl (Part 3)
- The Labyrinth’s Treasure and The Bond of Friendship (Part 1)
- The Labyrinth’s Treasure and The Bond of Friendship (Part 2)
- The Search for Sweetness and The Inspection to the North (Part 1)
- The Search for Sweetness and The Inspection to the North (Part 2)
- The Northern Pioneer Village and the Opposition Against Elves (Part 1)
- The Northern Pioneer Village and the Opposition Against Elves (Part 2)
- Interlude 6 - Bruno’s Worries (Part 1)
- Interlude 6 - Bruno’s Worries (Part 2)
- The Elf Girl and Jill’s Cookies (Part 1)
- The Elf Girl and Jill’s Cookies (Part 2)
- The Elf Girl and Jill’s Cookies (Part 3)
- Descendant of the World Tree and the Daughter of Cattleya (Part 1)
- Descendant of the World Tree and the Daughter of Cattleya (Part 2)
- Dreams of Old Days and Hope for the Future
- Interlude 7 - The Guardians Meeting Up (Part 1)
- Interlude 7 - The Guardians Meeting Up (Part 2)
- The Fairy King’s Hospitality and Celebration of the World Tree (Part 1)
- The Fairy King’s Hospitality and Celebration of the World Tree (Part 2)
- The Village’s Specialty and The Bracelet of Friendship (Part 1)
- The Village’s Specialty and The Bracelet of Friendship (Part 2)
- The Village’s Specialty and The Bracelet of Friendship (Part 3)
- The Cafe in Consul and the Prince’s Visit (Part 1)
- The Cafe in Consul and the Prince’s Visit (Part 2)
- The Three Young Men and Jill’s Romance Circumstances (Part 1)
- The Three Young Men and Jill’s Romance Circumstances (Part 2)
- The Men Competing and Bonding Skin-to-Skin
- The Invitation to the Capital and the Single Portrait (Part 1)
- The Invitation to the Capital and the Single Portrait (Part 2)
- The Truth of the Princess and the Twists and Turns of Fate (Part 1)
- The Truth of the Princess and the Twists and Turns of Fate (Part 2)
- Interlude 8 - Cestlavie the Child Prodigy (Part 1)
- Interlude 8 - Cestlavie the Child Prodigy (Part 2)
- Syltianna’s Excuse and Behind the Scene of the Imperial City (Part 1)
- Syltianna’s Excuse and Behind the Scene of the Imperial City (Part 2)
- The Floriography of Cattleya and Ragweed (Part 1)
- The Floriography of Cattleya and Ragweed (Part 2)
- Returning the ID and Preparing for the Study Abroad (Part 1)
- Returning the ID and Preparing for the Study Abroad (Part 2)
Volume 3
- Departure and Roadblocks (Part 1)
- Departure and Roadblocks (Part 2)
- The Orc Mania and The Princess’ Frenzy (Part 1)
- The Orc Mania and The Princess’ Frenzy (Part 2)
- The Street in Spring and the Memory of Summer (Part 1)
- The Street in Spring and the Memory of Summer (Part 2)
- The Princess in Captive and The Priest under Siege (Part 1)
- The Princess in Captive and The Priest under Siege (Part 2)
- The Curse of the Princess and the Failure of the Monster Tamer (Part 1)
- The Curse of the Princess and the Failure of the Monster Tamer (Part 2)
- Ladies on the Trade Port and Ladies on the Road (Part 1)
- Ladies on the Trade Port and Ladies on the Road (Part 2)
- The Peddler’s Tale of Old and the Two Promises (Part 1)
- The Peddler’s Tale of Old and the Two Promises (Part 2)
- The Melancholy of Boys and Girls and the Settlement of the Game of Tag (Part 1)
- The Melancholy of Boys and Girls and the Settlement of the Game of Tag (Part 2)
- The Encounter in the Entrance Ceremony and the Wordless Talk of the Show (Part 1)
- The Encounter in the Entrance Ceremony and the Wordless Talk of the Show (Part 2)
- Building Underground Rapport and the Flowers of the Academy (Part 1)
- Building Underground Rapport and the Flowers of the Academy (Part 2)
- Tea Party Invitation and Wax-Sealed Letter (Part 1)
- Tea Party Invitation and Wax-Sealed Letter (Part 2)
- Interlude 9 — Euphemia, the Youngest Princess, and her Elder Sister (Part 1)
- Interlude 9 — Euphemia, the Youngest Princess, and her Elder Sister (Part 2)
- The Childhood Friend’s Salamander and the Prince’s Wyvern (Part 1)
- The Childhood Friend’s Salamander and the Prince’s Wyvern (Part 2)
- The Chalk House and the Crossdressing Princesses (Part 1)
- The Chalk House and the Crossdressing Princesses (Part 2)
- The Prince’s Kiss and the Swindler’s Kiss (Part 1)
- The Prince’s Kiss and the Swindler’s Kiss (Part 2)
- Green Private Room and Chaotic Human Relationship (Part 1)
- Green Private Room and Chaotic Human Relationship (Part 2)
- The Encounter in the Guild and the Egg of Something (Part 1)
- The Encounter in the Guild and the Egg of Something (Part 2)
- The Awakening of the Dragon Knight and the Incubation’s Requirements (Part 1)
- The Awakening of the Dragon Knight and the Incubation’s Requirements (Part 2)
- The Broad Chairwoman’s Special Lecture and the Fulfillment of Regular Request (Part 1)
- The Broad Chairwoman’s Special Lecture and the Fulfillment of Regular Request (Part 2)
- The Sprinting Salamander and the Investigation in the Haunted Mansion (Part 1)
- The Sprinting Salamander and the Investigation in the Haunted Mansion (Part 2)
- Kneeling in the Villa Area and the Abandoned Mansion (Part 1)
- Kneeling in the Villa Area and the Abandoned Mansion (Part 2)
- Interlude 10: Ashimi and the Half-Elf Girl (Part 1)
- Interlude 10: Ashimi and the Half-Elf Girl (Part 2)
- Interlude 10: Ashimi and the Half-Elf Girl (Part 3)
- Interlude 10: Ashimi and the Half-Elf Girl (Part 4)
- The Beauty under the Moonlight and the Prowler in the Attic (Part 1)
- The Beauty under the Moonlight and the Prowler in the Attic (Part 2)
- The Identity of the Ghost and the Wandering Painter (Part 1)
- The Identity of the Ghost and the Wandering Painter (Part 2)
- The Significance of Strength and the Boy’s Tears (Part 1)
- The Significance of Strength and the Boy’s Tears (Part 2)
- Luke’s Sister and the Inner Workings of Various Countries (Part 1)
- Luke’s Sister and the Inner Workings of Various Countries (Part 2)
- The Joy of Birth and The Student Council’s Invitation (Part 1)
- The Joy of Birth and The Student Council’s Invitation (Part 2)
- Jill’s Week and Cestlavie’s Plan
- Trial and Error in Talisman Art and the Hatching Egg (Part 1)
- Trial and Error in Talisman Art and the Hatching Egg (Part 2)
- The Grouping for Field Study and the Student Council's Proposal (Part 1)
- The Grouping for Field Study and the Student Council's Proposal (Part 2)
- Interlude 11 - Elias the Student Council Executive Member (Part 1)
- Interlude 11 - Elias the Student Council Executive Member (Part 2)
- The Holy Maiden Princess’ Seal and the King of the Undead (Part 1)
- The Holy Maiden Princess’ Seal and the King of the Undead (Part 2)
- The Golden Haired Prince and the Soot Haired Prodigy (Part 1)
- The Golden Haired Prince and the Soot Haired Prodigy (Part 2)
- The Monologue of the Frontier Count and the Midnight Raid (Part 1)
- The Monologue of the Frontier Count and the Midnight Raid (Part 2)
- The Ogre of the Legends and the Church from the Legend (Part 1)
- The Ogre of the Legends and the Church from the Legend (Part 2)
- The Doors of Destiny and the Sealing Magic Formation (Part 1)
- The Doors of Destiny and the Sealing Magic Formation (Part 2)
- The Mysterious Dungeon and Summoning the Helper (Part 1)
- The Mysterious Dungeon and Summoning the Helper (Part 2)
- The Identity of the Magic Formation and the Fishes in the Barrel (Part 1)
- The Identity of the Magic Formation and the Fishes in the Barrel (Part 2)
- Backwater Explorers and Angry Knights (Part 1)
- Backwater Explorers and Angry Knights (Part 2)
- The House-Sitting Girl and the Underground Lab (Part 1)
- The House-Sitting Girl and the Underground Lab (Part 2)
- The Puppet Maid's Hospitality and the Truth Behind the Legend (Part 1)
- The Puppet Maid's Hospitality and the Truth Behind the Legend (Part 2)
- Prof. Victor's Laboratory and the Truth about the Saint (Part 1)
- Prof. Victor's Laboratory and the Truth about the Saint (Part 2)
- Interlude 12: The Philosophy of the Pig-Headed Father
- The Saintess’ Seal and the Fountain of Sacrifice
- The Chaos of the Destruction and the Resurrection of Professor Victor (Part 1)
- The Chaos of the Destruction and the Resurrection of Professor Victor (Part 2)
- The Professor's Strange Enthusiasm and the Seal's Key (Part 1)
- The Professor's Strange Enthusiasm and the Seal's Key (Part 2)
- The Recollection of the Dead and the Protective Necklace (Part 1)
- The Recollection of the Dead and the Protective Necklace (Part 2)
- The No-Life King's Arrival and the Descent of the Shrine Maiden Princess (Part 1)
- The No-Life King's Arrival and the Descent of the Shrine Maiden Princess (Part 2)
- The Prince in the Tower and the Princess to the Rescue
- The Light of Purifying Flame and the Battle against the Giant Ogre (Part 1)
- The Light of Purifying Flame and the Battle against the Giant Ogre (Part 2)
- The Lament of the Death Knight and the Doll's Secret Weapon (Part 1)
- The Lament of the Death Knight and the Doll's Secret Weapon (Part 2)
- A Clash in Darkness and the Use of the Trump Card (Part 1)
- A Clash in Darkness and the Use of the Trump Card (Part 2)
- The Dud Ultimate Weapon, and the Exposed Secrets
- The Activation of the Self-Destruct Mechanism and Parting Words (Part 1)
- The Activation of the Self-Destruct Mechanism and Parting Words (Part 2)
- The Red Light Zone and the Three Working as One (Part 1)
- The Red Light Zone and the Three Working as One (Part 2)
- The Emissary of the Superempire and the Wrath of the No-Life King (Part 1)
- The Emissary of the Superempire and the Wrath of the No-Life King (Part 2)
- The Saintess's Whisper and the End of Obsession (Part 1)
- The Saintess's Whisper and the End of Obsession (Part 2)
- The Saintess's Whisper and the End of Obsession (Part 3)
Volume 4
- The Holy Land of the Priestess and the Current State of the Shrine Maiden Princess (Part 1)
- The Holy Land of the Priestess and the Current State of the Shrine Maiden Princess (Part 2)
- The Daily Life in the Holy City of Tera Merita and The Request for Escort (Part 1)
- The Daily Life in the Holy City of Tera Merita and The Request for Escort (Part 2)
- The Adventurer's Daily Life and the Holy Land’s Labyrinth (Part 1)
- The Adventurer's Daily Life and the Holy Land’s Labyrinth (Part 2)
- Clara’s Fame and the Maidens’ Schemes (Part 1)
- Clara’s Fame and the Maidens’ Schemes (Part 2)
- The Shrine Maiden’s Strategy and the Heir at the Shared Table (Part 1)
- The Shrine Maiden’s Strategy and the Heir at the Shared Table (Part 2)
- The Young Noble's Efforts and the Scion's Objective (Part 1)
- The Young Noble's Efforts and the Scion's Objective (Part 2)
- The Man’s Servant and the Rival’s Arrival (Part 1)
- The Man’s Servant and the Rival’s Arrival (Part 2)
- The Scion Working Hard and the Girls Butting Heads (Part 1)
- The Scion Working Hard and the Girls Butting Heads (Part 2)
- The Girls Butting Heads and the Storm of Trouble (Part 1)
- The Girls Butting Heads and the Storm of Trouble (Part 2)
- Interlude 13: The Journalist of the Holy City (Part 1)
- Interlude 13: The Journalist of the Holy City (Part 2)
- The Poor Man’s Gold and the Margrave’s Butler (Part 1)
- The Poor Man’s Gold and the Margrave’s Butler (Part 2)
- Chaotic Discussions and a Mysterious Coded Letter (Part 1)
- Chaotic Discussions and a Mysterious Coded Letter (Part 2)
- The Course of the Interrogation and the Battle-Hardened Elite Priest (Part 1)
- The Course of the Interrogation and the Battle-Hardened Elite Priest (Part 2)
- The Church’s Schemes and Jill’s Romantic Consultations (Part 1)
- The Church’s Schemes and Jill’s Romantic Consultations (Part 2)
- The Phantom Thief’s Objective and the Misty Holy City (Part 1)
- The Phantom Thief’s Objective and the Misty Holy City (Part 2)
- The Phantom Thief’s Skill and the Misty Street Corners (Part 1)
- The Phantom Thief’s Skill and the Misty Street Corners (Part 2)
- The Encounter in the Drizzle and the Underground Guildmaster (Part 1)
- The Encounter in the Drizzle and the Underground Guildmaster (Part 2)
- The Lost Sheep and the Oath of the Holy Scriptures (Part 1)
- The Lost Sheep and the Oath of the Holy Scriptures (Part 2)
- The Hazy Moon Attack and the Golden Pocket Watch (Part 1)
- The Hazy Moon Attack and the Golden Pocket Watch (Part 2)
- The Water Demons’ Attack and the Late-Night Encounter (Part 1)
- The Water Demons’ Attack and the Late-Night Encounter (Part 2)
- The Revived Maid and the Secret Plan (Part 1)
- The Revived Maid and the Secret Plan (Part 2)
- The Indiscrete Maid and the Divulged Secrets
- The Sheep’s Escape and the Maiden’s Ordeal (Part 1)
- The Sheep’s Escape and the Maiden’s Ordeal (Part 2)
- Dawn in the Morning Mist and Cleaning Up the Aftermath (Part 1)
- Dawn in the Morning Mist and Cleaning Up the Aftermath (Part 2)
- The Angel in the Back Alley and the Candy House (Part 1)
- The Angel in the Back Alley and the Candy House (Part 2)
- The Slaver’s Mansion and the Whereabouts of the Clue (Part 1)
- The Slaver’s Mansion and the Whereabouts of the Clue (Part 2)
- The Demon Boy and the Slave Trader’s Bodyguard (Part 1)
- The Demon Boy and the Slave Trader’s Bodyguard (Part 2)
- Eren’s Oath and the Boy’s Name (Part 1)
- Eren’s Oath and the Boy’s Name (Part 2)
- The Pope of the Sanctorium and the False Shrine Maiden Princess (Part 1)
- The Pope of the Sanctorium and the False Shrine Maiden Princess (Part 2)
- The Council of Sages and the Outcome of the Sentencing (Part 1)
- The Council of Sages and the Outcome of the Sentencing (Part 2)
- The Value of the "Shrine Maiden Princess" Title and a Summons from the Bouncer (Part 1)
- The Value of the "Shrine Maiden Princess" Title and a Summons from the Bouncer (Part 2)
- The Luminous Butterfly Dancer and the Bodyguard’s Family (Part 1)
- The Luminous Butterfly Dancer and the Bodyguard’s Family (Part 2)
- Martha’s Views on Love and the Bouncer’s Betrayal (Part 1)
- Martha’s Views on Love and the Bouncer’s Betrayal (Part 2)
- A Choice of Lives and the Reason for Betrayal (Part 1)
- A Choice of Lives and the Reason for Betrayal (Part 2)
- Scars of the Past and Medals of the Present (Part 1)
- Scars of the Past and Medals of the Present (Part 2)
- Exploration of the Underground Abandoned Mine and the Boy’s Name (Part 1)
- Exploration of the Underground Abandoned Mine and the Boy’s Name (Part 2)
- Exploration of the Underground Abandoned Mine and the Boy’s Name (Part 3)
- The Queen of the Discarded Lifeforms and Jill's Blade (Part 1)
- The Queen of the Discarded Lifeforms and Jill's Blade (Part 2)
- Words of Promise and a Maiden's Hidden Strength (Part 1)
- Words of Promise and a Maiden's Hidden Strength (Part 2)
- Mediation with the Güllens and the Main Dish of the Feast (Part 1)
- Mediation with the Güllens and the Main Dish of the Feast (Part 2)
- How the Dungeon Came to Be and the Queen of the Wastebeasts (Part 1)
- How the Dungeon Came to Be and the Queen of the Wastebeasts (Part 2)
- Choosing Path and the Golem Trap (Part 1)
- Choosing Path and the Golem Trap (Part 2)
- The Hardship in the Cave and the Battle with the Golem (Part 1)
- The Hardship in the Cave and the Battle with the Golem (Part 2)
- The Underground of the Holy City and the Crucible of Chaos (Part 1)
- The Underground of the Holy City and the Crucible of Chaos (Part 2)
- The Butler of the Frontier Count and the Truth of Her Whereabouts
- The Mother of Wastebeasts and the Artificial Saint
- A Tryst of Lovers and the Shrine Maiden Princesses' Question (Part 1)
- A Tryst of Lovers and the Shrine Maiden Princesses' Question (Part 2)
- Eliza’s Surrender and Maria Lou’s Secret (Part 1)
- Eliza’s Surrender and Maria Lou’s Secret (Part 2)
- The Two Clara and the Final Goal (Part 1)
- The Two Clara and the Final Goal (Part 2)
- The Holy Peak's True Dragon and the Stage of the Final Battle (Part 2)
- The Holy Peak’s True Dragon and the Stage of the Final Battle (Part 1)
- The Fierce Clash and Their Individual Battles (Part 1)
- The Fierce Clash and Their Individual Battles (Part 2)
- The Entrance of the Main-Players and the Shrine Maiden Princess’s Kiss (Part 1)
- The Entrance of the Main-Players and the Shrine Maiden Princess’s Kiss (Part 2)
- The End of the Story and the Cleanup of the Holy Capital
- Darkness, and the Light of the Future
- Confirming the Plan and The Will to Escape
- The Trinity Path and the Spirit of Time
- Return to the Future and a New Era for Livitium
- The White Dragon of the Sacred Peak and the Journey’s End (Part 1)
- The White Dragon of the Sacred Peak and the Journey’s End (Part 2)
Volume 5
- Return of the Shrine Maiden Princess and the Fate of the Holy Capital (Part 1)
- Return of the Shrine Maiden Princess and the Fate of the Holy Capital (Part 2)
- Fathom Spell Arts and Farewell to the Holy Capital (Part 1)
- Fathom Spell Arts and Farewell to the Holy Capital (Part 2)
- The People of Central Capital and Jill’s Struggle
- The Prayer of the Shrine Maiden Princess and the Ordeal of the Frontier Count (Part 1)
- The Prayer of the Shrine Maiden Princess and the Ordeal of the Frontier Count (Part 2)
- The Concerto of the Central Capital and the Reminiscence of the Frontier Count (Part 1)
- The Concerto of the Central Capital and the Reminiscence of the Frontier Count (Part 2)
- The Covert Operations of the Demihuman Liberation Front and the Outcome of the Assault (Part 1)
- The Covert Operations of the Demihuman Liberation Front and the Outcome of the Assault (Part 2)
- The Aftermath of the Conspiracy and the Night of Pursuit (Part 1)
- The Aftermath of the Conspiracy and the Night of Pursuit (Part 2)
- Dance of Illusion and in the Darkness
- The Princess of the Ruins and the Night of Flames (Part 1)
- The Princess of the Ruins and the Night of Flames (Part 2)
- A Visitor from Consul and the Course of the Conspiracy (Part 1)
- A Visitor from Consul and the Course of the Conspiracy (Part 2)
- Two Guildmasters and a Maid’s Present (Part 1)
- Two Guildmasters and a Maid’s Present (Part 2)
- The Rumored Man and the Shadow of the Heretical Cult (Part 1)
- The Rumored Man and the Shadow of the Heretical Cult (Part 2)
- The Golden Guild Card and the Founding Festival Preparations (Part 1)
- The Golden Guild Card and the Founding Festival Preparations (Part 2)
- The Two Impostors and the Puppeteer’s Thread (Part 1)
- The Two Impostors and the Puppeteer’s Thread (Part 2)
- The Two Impostors and the Puppeteer’s Thread (Part 3)
- Chairwoman’s Advice and the Dazzling Ladies (Part 1) (Unlocks on July 21, 2026)
- Chairwoman’s Advice and the Dazzling Ladies (Part 2) (Unlocks on July 28, 2026)
- Interlude 14: Crimson Snow Falls on the Imperial Festival (Part 1) (Unlocks on August 4, 2026)
Views: 1,829
Share this:
Support Us
Unlock Early Access
∴ Support your favorite series and unlock chapters before the public release. |